
|
||||
| INDEX | next
|
 |
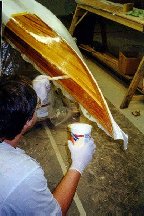
The best place to start applying epoxy is about two feet from the end of the kayak. This accomplishes several things:
|
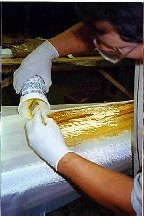 |
Here,
I am using West System epoxy with 'special coating hardener (207)'. I recommend that you mix small
batches (3-5 pump shots)at a time for the first wet-out coat. It takes more effort and time to saturate
the cloth and wood then the subsequent 2 to 3 filler coats. |
 |
It
helps to apply the first few batches with a brush and then switch to a squeegee to spread the resin
in flatter and horizontal areas. Vertical sections such as the tips and the sheer are done best with a brush. Don't fuss too much over any particular area. The important thing is to have enough epoxy on the surface for the wood and glass to saturate. |
 |
There
is no need to rush things either. Having applied about three batches of epoxy I always come back
to the starting point to iron out any problems. Big bubbles, dry patches or wrinkles should be addressed
now. As the wood soaks up the resin you may need to add more or redistribute it around with the squeegee. It is preferable to have more epoxy on the surface then not enough. The dull looking fibers of the fabric will unmistakably reveal resin drought. Everything should be glossy with the completely transparent fabric weave showing through. |
 |
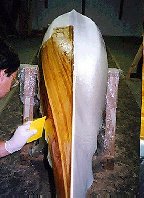
For the sake of sanity, it is equally
important to keep the epoxy from dripping to the other side. Starting to squeegee too prematurely leaves the wood too dry and weakens the bond between it and the cloth. De-lamination on impact is more likely to develop. |
| INDEX |
| Home | Kayak Designs | Kayak Shop | Materials | Kayak Gallery | About us |
| Building Manual | Plans | Sandwich Core | Wood Kayak | Order | |
| Epoxy Test | Abrasion Cloth | Rudder | Resources | Choosing Kayak | Guestbook |
If you notice any problems with the site (i.e. error links, missing images) please, let me know. Thanks
Mail:
Vaclav Stejskal
58 Wood Ln.
Acton, MA 01720
USA
Tel: 781-481-9261
© 1999
- 2024 Copyright Vaclav Stejskal
All rights reserved
Last page update:
9 May 2024