
 |
||||
| INDEX | next
|
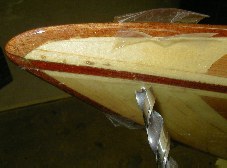 |
One hole is made first,
which is then filled with thick epoxy putty. Lightweight filler made of
phenolic or glass microbaloons is good (WestSystem 410, cedar dust etc..).
Use a caulking tube to pipe the stuff in. The next day, drill all the
way through. Additional sealing with either epoxy and/or varnish is required
to protect the wood and ensure that there are no voids. |
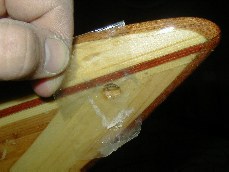 |
This job is the very
last thing to do after varnishing so it is important to protect the finish
with tape. Note how cleanly the brad point drill cuts through the bow. When all is done the tape is just peeled off and no cleanup is necessary. TIP: You can lighten this construction significantly by gluing a shaped piece of cedar into the tip right before bonding the shells together. Brush some epoxy on it before it become inaccessible. Since you know where you will be drilling, the piece can be very small and shaped to bridge the gap accurately (use epoxy putty). Once you punch through with a drill, it will be all solid wood which just needs a coat of epoxy. I have done that on the S&G Cirrus. No need to pump dead weight into the kayak. |
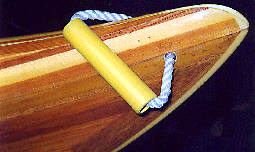 |
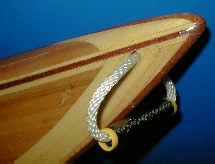
Finished bow on a Cape Ann Double. |
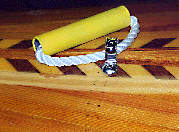 |
A
stern loop is mounted with stainless eye. Large rubber and stainless steel
washers from below help to dissipate the stresses and protect the cedar
core from crushing. |
 |
The black handle on the kayak was made from carbon fiber. See how to make graphite tubing. |
| INDEX |
| Home | Kayak Designs | Kayak Shop | Materials | Kayak Gallery | About us |
| Building Manual | Plans | Sandwich Core | Wood Kayak | Order | |
| Epoxy Test | Abrasion Cloth | Rudder | Resources | Choosing Kayak | Guestbook |
If you notice any problems with the site (i.e. error links, missing images) please, let me know. Thanks
Mail:
Vaclav Stejskal
58 Wood Ln.
Acton, MA 01720
USA
Tel: 781-481-9261
© 1999
- 2024 Copyright Vaclav Stejskal
All rights reserved
Last page update:
9 May 2024