
|
||||
| INDEX | next
|
 |
Bonding
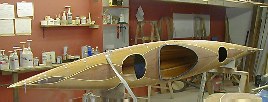
of the shells in general is quite straight forward. The only snag requiring
the skills of a contortionist is the unrolling of the fiberglass tape deep
into the tips of the kayak. Working with a brush on a four foot stick with
your head and hands jammed inside a hatch will test your patience but this
is IT! The kayak is basically done. Some form of portable light will be helpful. |
 |
The
fiberglassing procedure in the Manual
assures that the two shells fit together like a glove at the sheerline.
The bead and cove interface is effective, too, in preventing the shells
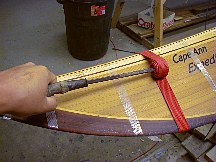
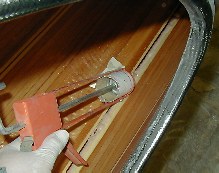
from creeping apart. A piece of webbing wound onto a screwdriver works as a very good clamp at the bow stem. Reinforced tape joins the halves temporarily. |
 |
Since
the outside of the kayak is wrapped in tape, the first seam job is done
on the inside. I usually choose an arbitrary point somewhere in the middle
of the seam and then measure the length of tape from that point into both
ends. Two pieces of tape make the job much more manageable. In this instance the tape was measured and cut prior to closing the kayak. It is important that the sheerline is roughened with sandpaper (40 grit) on both sides to assure good secondary (mechanical) bond with the tape. Again, if you use slow curing epoxy (MAS) and bond the shells soon, sanding can be skipped. |
 |
It
is not necessary that the tape reaches all the way to the tips (6"
gap is OK) but it must be centered on the seam. This brings me to another
point, the raw wood of the sheer at the tips must be sealed with
epoxy immediately prior to bonding the shells. There is no guarantee that
it can be sealed afterwards. |
 |
 |
 |
Since
there is no sanding, only one layer of 2.5 - 3" fiberglass tape is
sufficient. The light colored band on the seam is lightweight epoxy slurry
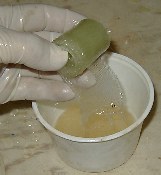
(phenolic microbaloons + epoxy+ milled glass fibers) that bridges the sometime
irregular joint. As I mentioned before, fiberglass will not adhere to sharp inside or outside corners without filleting or rounding off. The epoxy saturated tape fuses nicely with the fillet. |
 |
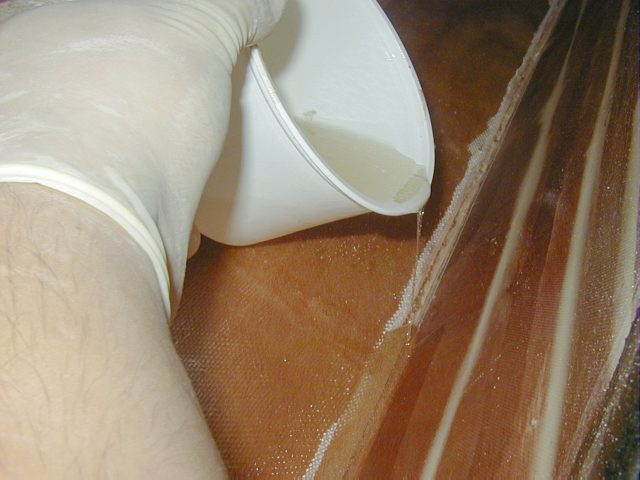
 Soak the roll tape and unroll it onto the seam. |
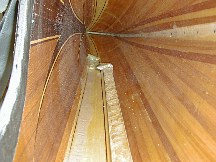 |
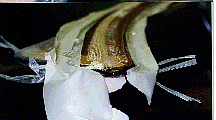
Glass
tape being unrolled into the tip of the Cape Ann Expedition. Note how the
tape 'fuses' with the fillet slurry and spans the deck-hull joint. This
assures maximum bonding strength. Procedure I use for inside bonding:
|
|
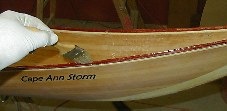
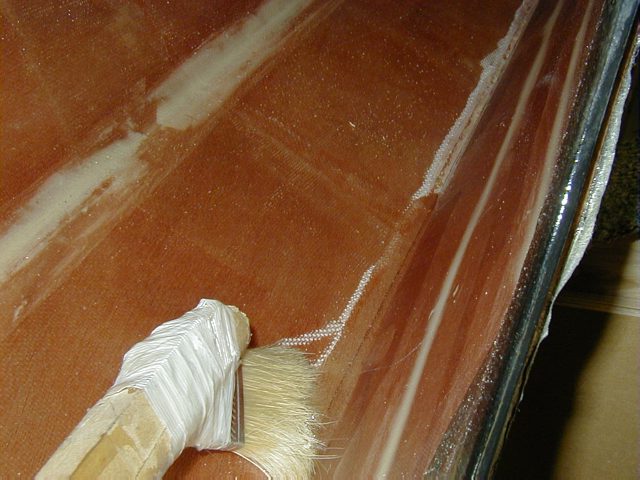
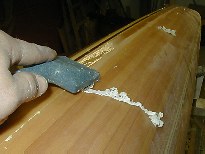
Taping
the outside is much simpler as in the photo of the bow; There is no soaking
of tape in epoxy or cutting it into pieces. There may be a few spots on
the sheer that need filling but that is it. It is essentially like normal
fiberglassing. Couple filler coats will be needed to hide the weave of the tape. Note the 2" masking tape for containing epoxy drips. Fiberglass trim trick - See how you can create a neat seam and avoid a lot of sanding by eliminating the salved edge of the fiberglass tape. This technique is especially useful for stitch & glue kayaks. |
 |
As
in the case of the cockpit rim, the feathering of the new epoxy into the
finished surfaces is best accomplished with a sharp scraper. Sanding cuts
into the fiberglass where it is needed most for strength. The filler coats on the tape should be thick enough so that the sander doesn't cut too much into the fibers. I like to use belt sander (80grit) after the first coat to knock down only the salved edges of the tape (1/4"-3/8"). Needless to say, one must be on guard with this tool here! If you want to be able to shave the transition in the epoxy as in the picture, avoid using fast hardeners alone for the filler coats. Fast hardener is too brittle and will chip and crack instead of 'shaving off'. |
| INDEX |
| Home | Kayak Designs | Kayak Shop | Materials | Kayak Gallery | About us |
| Building Manual | Plans | Sandwich Core | Wood Kayak | Order | |
| Epoxy Test | Abrasion Cloth | Rudder | Resources | Choosing Kayak | Guestbook |
If you notice any problems with the site (i.e. error links, missing images) please, let me know. Thanks
Mail:
Vaclav Stejskal
58 Wood Ln.
Acton, MA 01720
USA
Tel: 781-481-9261
© 1999
- 2024 Copyright Vaclav Stejskal
All rights reserved
Last page update:
9 May 2024