
|
||||
| INDEX | next
|
 |
Minicel
foam is just about the best material one can use for lightweight
kayak seats. It is light, waterproof, and very comfortable to touch and
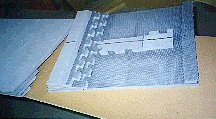
to cushion. Some builders like to use a 3" block and carve the seat shape into it. I prefer to do it by laminating two 5/8" or 3/4" pieces together. The added benefit of thinner sheets is that unlike the 3" block, that they have very smooth factory shaved finish. The advantage of a carved seat, on the other hand, is a deep and more supportive 'ergonomic' shape. This seat is 20" long and 17.5" wide. Two sheets are enough to make a seat with good thigh support. |
 |
Minicel
foam is very workable and can be cut easily with a knife and sanded with
a disk or belt sander. Good quality spray adhesive is good enough to bond
the sheets but it can de-laminate at the edges with time. The best glue
I found for this is 'Household' or 'Marine GOOP'. It is available in most
hardware stores. Apply only a thin layer around the edges and a few dabs in the middle of the bonding area and clamp or weigh the foam down. You can sandwich it between plywood sheets to distribute the clamping pressure better. In order to stop the foam from sliding on the glue, 'skewer' the layers together with a few nails! Just poke nails to the side and through the sheets at an angle before clamping. Pull them out later with pliers. You will notice that any solvent on the foam will expand the treated surface . Clamp the pieces together as soon as you can. To retain its smooth factory finish, only the underside is shaped to fit one's behind and the kayak bottom profile. The top side need not be marred by the disk grinder at all. |
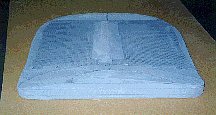 |
The
bottom of a finished seat contoured to fit the profile of the hull. Using 5/8" stock guarantees that the center of gravity of the paddler is not any higher than necessary. If you make a carved seat, the 'depth' gauging is a bit trickier. See how to make a kayak seat from a thick foam block. Note: The location of the Paddler's vertical center of gravity (VCG) has a great effect on the stability and feel of the kayak. The lower the better. Raising the seat 1" can reduce the stability significantly! In some tested kayak designs this reduction was up to 50%. Flat water racing kayak seats are raised for optimal application of power to the paddle stroke at the expense of stability. Sea Kayaks on the other hand should be optimized for safety and seaworthiness first, which means low kayak seat. Minicel foam is available in sheets of 5/8", 3/4" and 3" thickness. Two types are currently available. The stiffer M200 and the softer L200. To order on-line click here. |
 |
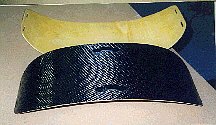
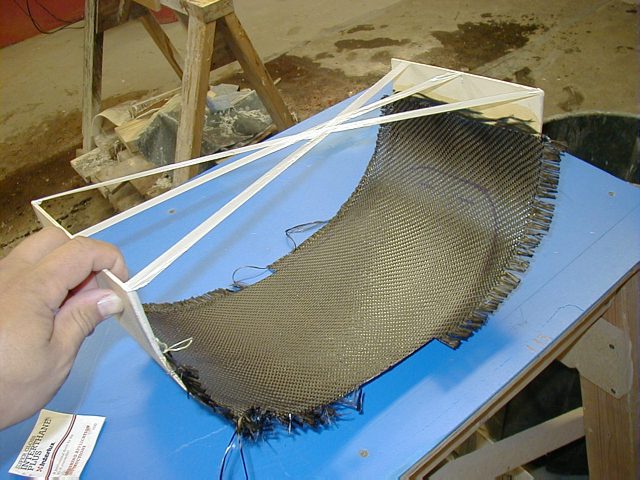
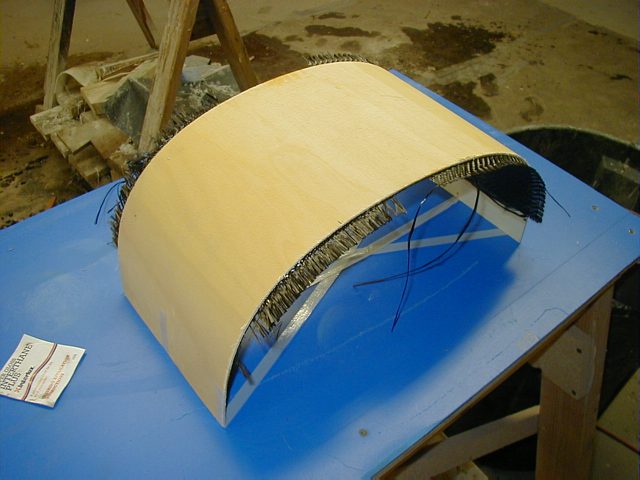
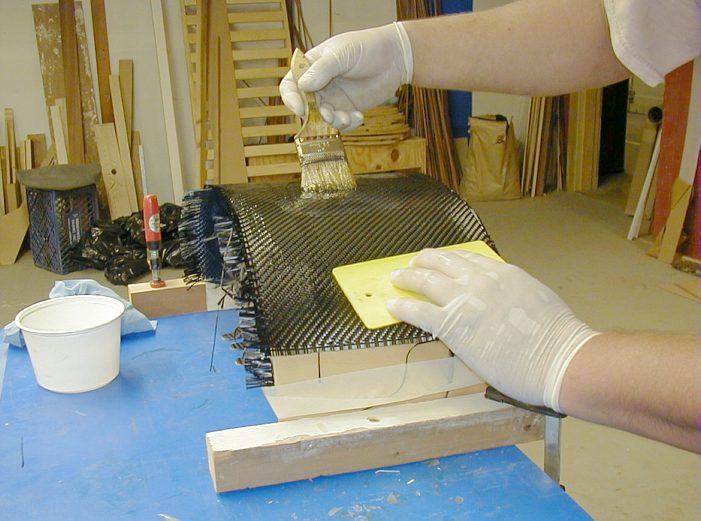
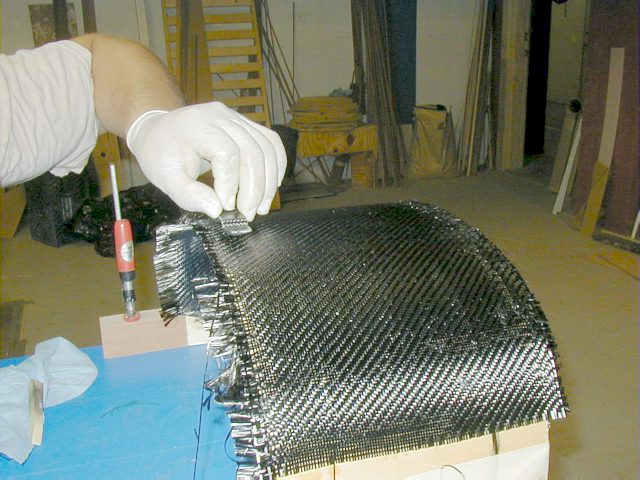
These
lightweight backrests were molded on the cockpit cutout template. The material
is 1/8" 'bendable birch' plywood reinforced with 5HS style carbon cloth
on the outside. The carbon holds the plywood in the desired shape and also
provides excellent reinforcement. The plastic film template is an arbitrary shape I find comfortable. The seat has a little bit of flex, so it really contours the lower back when leaned into in the kayak. |
 |
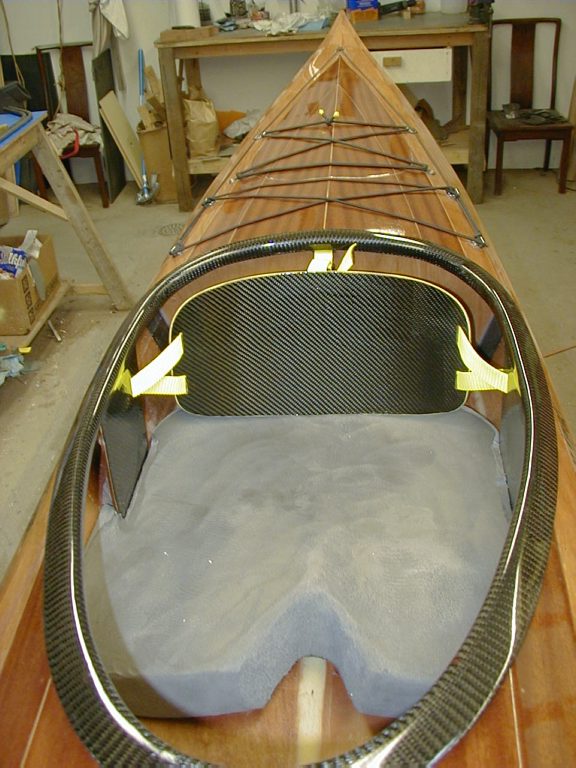
Note the strapping loops on the backside. They hold the seat suspended so that it doesn't flop around. They also permit fine adjustment of the backrest. |
 |
  |
 |
|
|
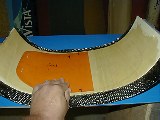
Finished
cockpit. Test the position and cushioning of the seat first and when you are satisfied glue it down. The foam is held down by a couple drops of Goop glue. If you plan to do some rigorous maneuvering such as rolling, you will need to install knee braces for good control and to hold yourself in the kayak. Thin plywood, reinforced by fiberglass and bonded under the coaming rim is fine. A shaped pad of minicel foam glued underneath will provide much needed cushioning and larger 'bracing surface' for a good grip. On narrower cockpits a piece of foam is good enough. The addition of knee braces reduces the front cockpit height somewhat and can make entering and exit a bit more challenging. If the butt plates feel too loose for rolling, pad them up with minicel foam as well so that your hips stay centered in the cockpit at all times. |
.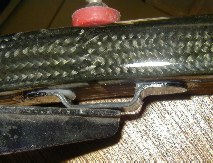 |
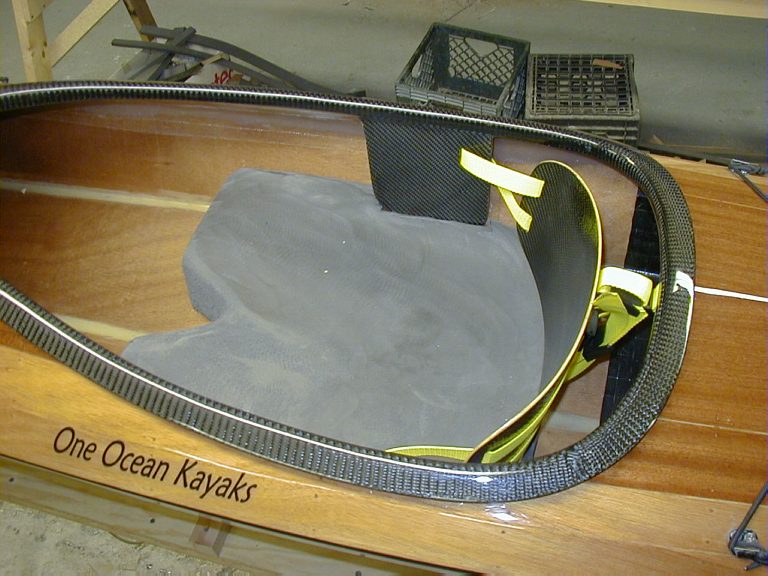
Detail
of backrest attachment loop. There is a LOT of stress on this little item.
Make certain that the bonding area is as large as practical and the surfaces
are sanded rough. The loop here is made of 100% carbon fabric and epoxy. It is unfortunate that all commercial hardware is made of either cheap plastic or heavy steel and both types can be mounted only by heavy fasteners. Bonded hardware is strong enough and very desirable in wood strip construction. The only exception was made in the case of the hatches because of ease of maintenance and varnishing. |
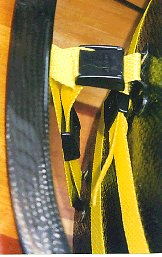 |
Detail
of the backrest attachment. One inch nylon webbing and plastic buckles are
used. This system allows fine adjustment of the pitch. A strong carbon loop (above) holds the webbing right under the back rim of the cockpit. |
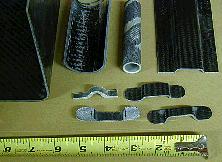 |
Endless
variety of custom shapes can be easily made
from carbon, fiberglass and resin. The molds for these parts were made from
scrap wood, plastic self-adhesive shelf cover or transparent packing tape
for 'mold release'. From left to right: -Blank for rudder body -Butt plate gusset -Carry loop handle -Webbing loop blank and individual eyes cut from it. |
| INDEX |
| Home | Kayak Designs | Kayak Shop | Materials | Kayak Gallery | About us |
| Building Manual | Plans | Sandwich Core | Wood Kayak | Order | |
| Epoxy Test | Abrasion Cloth | Rudder | Resources | Choosing Kayak | Guestbook |
If you notice any problems with the site (i.e. error links, missing images) please, let me know. Thanks
Mail:
Vaclav Stejskal
58 Wood Ln.
Acton, MA 01720
USA
Tel: 781-481-9261
© 1999
- 2024 Copyright Vaclav Stejskal
All rights reserved
Last page update:
9 May 2024